
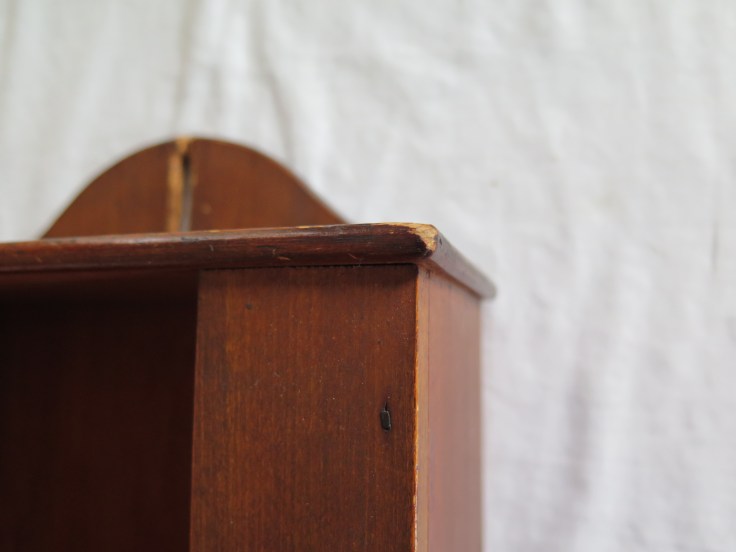
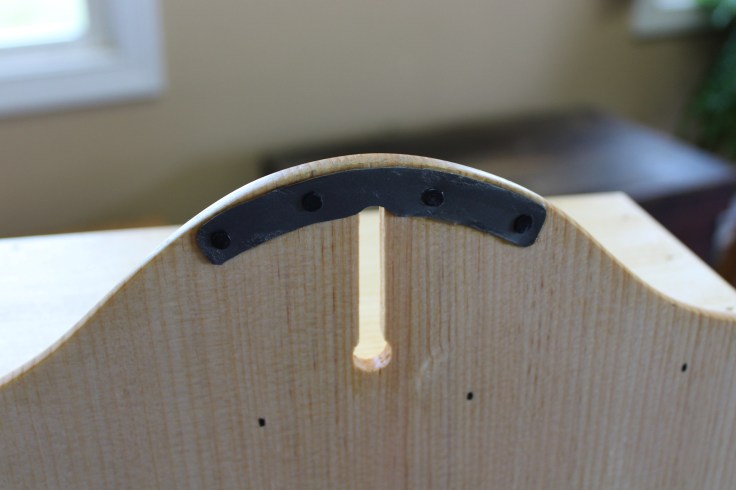
On my last visit to Hancock Shaker Village I took some quick photos and measured this little hanging cabinet from their collection. This cabinet is probably familiar to you, it is in many books on Shaker furniture and is one of HSV’s more famous pieces. It is simply made in white pine, all nailed construction but not just thrown together. Like most Shaker pieces, thought went in to it’s construction and appearance. The proportions are excellent and built in the manner of other hanging cabinets I have seen. Everything ties to the back board so that the top and bottom boards which are nailed into end grain (very weak) are not really supporting much more than their own weight.
I have even wondered if this little cabinet is not somehow connected to Isaac N. Youngs. It is made in the exact manner of his 1840 style clock cases, down to the same type of nails he used. He was well known for signing or at least initialing his work but no signature of any kind is present on the cabinet.
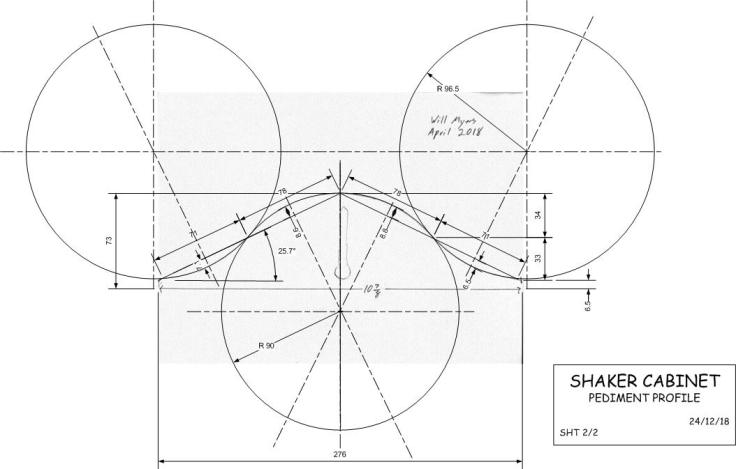
Anyway, below are some photos of the cabinets details that are not in the books. Also, a measured drawing I made including a tracing of the pediment profile.


")
Below are the drawings I made at Hancock this past spring. Save them to your computer, you will be able to zoom in and decipher my chicken scratch more easily!


I hope everyone has a wonderful Christmas!
-Will Myers
Addendum: Russ Hammond of Brisbane, Australia took the above sketch and made a much better version. The dimensions are metric. Thanks Russ!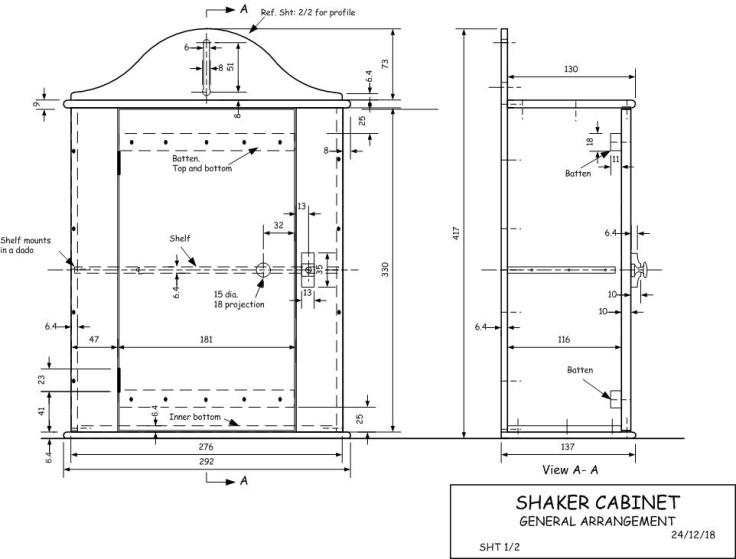

It is nice to see more information and photos of this cabinet. I have built a version from Christopher Schwarz’ article in Popular Woodworking. I admit that I used cherry and not pine.
LikeLike
Very cool, thanks for the drawings Will.
LikeLike
I simply commend you for making a reproduction in pine.
LikeLike
Awesome post Will! Looks like a great little project.
LikeLike
Thank you Will. What a lovely little project.
LikeLike
I love this extra detail Will, thank you for sharing this. What size nails did you use in your copy?
LikeLike
I used 1 1/4″ headless cut brads from Tremont Nail. I also bored pilot holes for most all of the nails…..the parts of this thing are pretty thin!
LikeLike